
intex 12×24 pool setup instructions
Intex 12×24 Pool Setup Instructions: A Comprehensive Guide
This guide details the setup of your Intex 12×24 pool, covering everything from unboxing to winterization, ensuring a refreshing summer experience.
The Intex 12×24 pool offers a fantastic, affordable option for backyard summer fun. This rectangular pool, part of the Ultra Frame series, provides a spacious swimming and relaxation area for families. Its robust frame construction, utilizing weathering steel with anti-corrosion treatment, ensures durability and longevity.
Proper setup is crucial for maximizing enjoyment and ensuring safety. This guide will walk you through each step, from initial unboxing and site preparation to filtration system installation and ongoing maintenance. Understanding the components and following these instructions carefully will prevent potential issues and guarantee a worry-free swimming season. Remember to consult all included documentation for specific details related to your model (like Intex 28274).
Unboxing and Inventory
Carefully unpack all components of your Intex 12×24 pool, taking note of the contents as you remove them from the packaging. A thorough inventory is the first critical step to ensure all necessary parts are present before beginning assembly. Refer to the parts list included in the packaging – typically a 65-page manual for models like the Intex 28274 – to verify everything is accounted for.
Expect to find frame rails, corner connectors, the pool liner, and potentially the filtration system components. Check for any visible damage to the frame pieces or liner. Document any discrepancies immediately and contact Intex customer support for replacements. A complete inventory now saves time and frustration later during the setup process;
Checking the Package Contents
Begin by carefully opening the Intex 12×24 pool packaging and laying out all the included items. Cross-reference each component with the detailed parts list, often found within a comprehensive manual – like the 65-page guide for the Intex 28274 model. Specifically, verify the presence of all frame pieces (rails and connectors), the pool liner itself, and any included accessories like the skimmer basket or return inlet.
Pay close attention to the quantity of each item. Missing parts can halt the setup process. Inspect each component for any manufacturing defects or shipping damage. Document any issues with photos and immediately contact Intex customer service to request replacements before proceeding with assembly. A meticulous check now prevents delays later.
Identifying Pool Components
Familiarize yourself with each part of your Intex 12×24 pool. The frame consists of curved rails – often made of weathering steel with anti-corrosion treatment – and corner connectors that join them. These rails determine the oval shape, differing from rectangular models like the Intex 18×9 x52. The liner is a heavy-duty PVC material, requiring careful handling to avoid punctures.
Identify the various inlets and outlets on the liner; these connect to the filtration system. Locate the skimmer basket and return jet components. Understand the purpose of each piece – the filter pump (covered later) connects to these inlets. Knowing each component’s function streamlines the assembly process and ensures correct installation, preventing future issues.
Site Preparation: Choosing the Right Location
Selecting the ideal location is crucial for a successful Intex 12×24 pool installation. The designated area should measure at least 12×24 feet, accommodating the pool’s dimensions and providing space for maintenance access. Prioritize a flat, level surface; even slight inclines can stress the frame and liner, potentially leading to collapse or uneven water distribution.
Thoroughly inspect the chosen site for any obstructions – rocks, roots, or buried debris. Critically, avoid areas with underground utilities; contacting your local utility companies is essential before digging. Sunlight exposure is also a factor; consider shade to reduce algae growth and chemical consumption. Proper site preparation minimizes risks and maximizes the pool’s lifespan.
Level Ground Requirements
Achieving perfectly level ground is paramount for your Intex 12×24 pool’s structural integrity. A deviation of even a few inches can create immense pressure on the frame and liner, leading to potential failure. Utilize a long level (at least 4 feet) and check the ground in multiple directions across the entire 12×24 foot area.
If the ground isn’t level, excavation or the addition of sand may be necessary. Compact the soil thoroughly after leveling and before frame assembly. Avoid using materials that could puncture the liner, like gravel or sharp rocks. Consistent leveling ensures even water distribution, prevents stress points, and extends the life of your pool investment.
Avoiding Underground Utilities
Before beginning any excavation or setup, meticulously identify and mark all underground utilities in the designated 12×24 foot area. This is a critical safety precaution to prevent damage to gas lines, electrical cables, water pipes, or communication lines – and to avoid potential injury.
Contact your local utility companies or utilize a “Call Before You Dig” service (like 811 in the US) to locate these hidden hazards. Never assume you know where utilities are located. Damage can result in service disruptions, costly repairs, and dangerous situations. Maintaining a safe distance from all underground infrastructure is non-negotiable during the entire installation process.
Assembling the Pool Frame
Constructing the Intex 12×24 pool frame requires careful attention to detail. Begin by laying out all frame components on a protected surface to prevent damage. The frame utilizes durable, weathering-resistant steel, designed for longevity. Ensure you have ample space to work around the perimeter of the intended pool location.
The assembly process involves connecting the long and short rails, followed by securing the corner connectors. Double-check that all connections are firmly locked into place, as a stable frame is crucial for supporting the water weight. Proper assembly prevents warping and ensures the pool maintains its shape throughout the season.
Connecting the Frame Rails
Begin connecting the frame rails by inserting the metal pins through the designated holes at each end. A rubber mallet can be helpful for gently tapping the pins into place, ensuring a secure fit without causing damage. Work systematically around the pool’s perimeter, alternating sides to maintain even tension.
Pay close attention to the rail orientation; some rails may have specific markings or features that dictate their position. Ensure all rails are flush and aligned before fully securing the pins. A properly connected frame is the foundation of a stable and safe pool, preventing potential collapses or distortions during water filling and use.
Installing the Corner Connectors
Once the frame rails are connected, install the corner connectors. These robust pieces join the ends of the rails, completing the rectangular or oval structure. Align the holes in the corner connectors with those in the frame rails, and insert the provided pins.
Again, a rubber mallet can assist in securing the pins, but avoid excessive force. Double-check that each corner connector is firmly attached and that the entire frame feels stable and square. Proper corner connector installation is crucial for the pool’s structural integrity, preventing warping and ensuring long-term durability. Inspect each connection for tightness before proceeding.
Liner Installation
With the frame assembled, carefully begin the liner installation process. This stage requires patience and attention to detail to avoid wrinkles and ensure a proper fit. Start by gently unfolding the liner near the pool frame, protecting it from sharp objects or rough surfaces that could cause punctures.
Position the liner so that the seam is aligned appropriately, typically running lengthwise. Avoid stretching the liner excessively during placement. The goal is to have it loosely draped inside the frame, ready for careful positioning and smoothing. Take your time; a well-installed liner is key to a leak-free and enjoyable swimming experience.
Preparing the Liner for Installation

Before placing the Intex 12×24 pool liner into the frame, allow it to warm up, especially if it’s been stored in a cool environment. This increases its flexibility, making it easier to maneuver and reducing the risk of tearing. Carefully unpack the liner and lay it out flat in a clean, spacious area, free from debris like pebbles or twigs.
Inspect the liner thoroughly for any manufacturing defects or damage sustained during shipping. Gently brush off any dust or dirt. Avoid using harsh chemicals or abrasive cleaners. Pre-fitting the liner loosely around the pool frame before full installation can help visualize placement and identify potential issues.
Carefully Placing the Liner into the Frame
With the liner prepped, begin gently placing it inside the assembled Intex 12×24 pool frame. Start with one end, carefully draping the liner over the frame rails, working your way around the perimeter. Avoid pulling or stretching the liner excessively, as this can cause stress and potential tears.
As you position the liner, ensure it’s centered within the frame. Smooth out any wrinkles or folds as you go, using your hands to gently guide the material. Take your time; a properly seated liner is crucial for a successful setup. Minor adjustments can be made before any water is added, ensuring a snug and even fit.
Filling the Pool with Water
Begin filling your Intex 12×24 pool slowly, using a garden hose with a spray nozzle set to a gentle flow. This controlled filling minimizes liner disturbance and allows for continuous smoothing. As the water level rises, periodically check for wrinkles or folds in the liner, gently working them outwards towards the pool walls.
Maintain constant monitoring of the liner’s placement during the initial stages of filling. Small adjustments are much easier to make with only a few inches of water. Avoid overfilling initially; focus on establishing a smooth, even liner fit before reaching the desired water level. A gradual approach ensures a secure and aesthetically pleasing pool setup.
Initial Water Level and Liner Smoothing
Once water begins to accumulate, focus on achieving a smooth liner fit. Start with just a few inches of water and carefully smooth out any wrinkles radiating from the pool’s base. Gently push wrinkles outwards towards the frame, utilizing your hands or a soft brush. Avoid pulling forcefully, as this could damage the liner.
As the water level gradually increases, continue this smoothing process. The weight of the water will naturally help settle the liner, but proactive smoothing prevents larger wrinkles from forming. Consistent attention during these initial stages is crucial for a professional-looking and long-lasting pool installation. Patience is key to a wrinkle-free experience!
Monitoring Liner Placement During Filling
Throughout the filling process, diligently monitor the liner’s placement. Pay close attention to the corners and sides, ensuring they remain properly seated within the frame. As the water level rises, wrinkles may shift or reappear; address them promptly with gentle smoothing motions.
Avoid filling the pool rapidly, as this increases the likelihood of liner displacement. A slower, controlled fill allows for easier adjustments and minimizes stress on the liner. Regularly walk around the pool, visually inspecting for any areas needing attention. Correcting minor issues early prevents significant problems later, guaranteeing a beautifully installed and functional Intex pool.
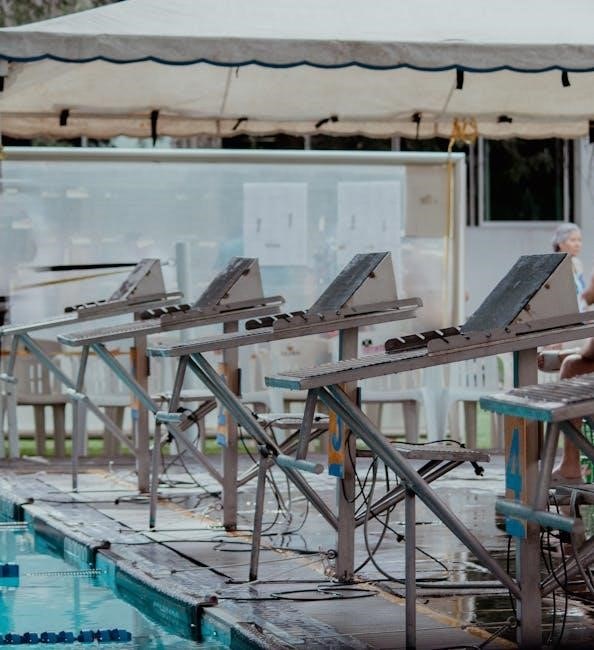
Installing the Filtration System

Proper filtration is crucial for maintaining clean and safe pool water. Begin by connecting the filter pump to the designated inlet and outlet ports on the pool wall, ensuring a secure and watertight fit. Double-check all connections to prevent leaks during operation.
Next, set up the filter cartridge within the pump housing, following the manufacturer’s instructions for correct placement. Ensure the cartridge is clean and free of debris before initial use. Once assembled, position the filtration system on a level surface near a grounded electrical outlet, adhering to all safety guidelines. A properly installed system will keep your Intex 12×24 pool sparkling.
Connecting the Filter Pump
Begin connecting the filter pump by attaching the hoses to the pool’s inlet and outlet fittings. Ensure a snug fit using the provided clamps to prevent water leakage – this is paramount for efficient filtration. The inlet hose draws water from the pool, while the outlet returns the filtered water.

Carefully align the hose connections with the pump’s corresponding ports, avoiding cross-threading. Tighten the clamps securely, but avoid over-tightening, which could damage the fittings; Before powering on, visually inspect all connections for any signs of potential leaks. A secure connection is vital for optimal performance and longevity of your filtration system.
Setting Up the Filter Cartridge
Before operation, the filter cartridge must be correctly installed within the filter housing. Open the filter housing carefully, following the manufacturer’s instructions, and locate the cartridge compartment. Insert the clean filter cartridge, ensuring it’s properly seated within the designated space – a snug fit is essential;
Secure the filter housing lid tightly, using the provided clamps or locking mechanism. A proper seal prevents unfiltered water from bypassing the cartridge. Regularly check and clean the filter cartridge as per the manual; a dirty cartridge reduces filtration efficiency. Replacing the cartridge periodically maintains optimal water clarity and hygiene for your Intex 12×24 pool.
Electrical Connections and Safety
Proper electrical connections are paramount for safe pool operation. Always ensure the pump and filter are connected to a dedicated circuit with the correct voltage, as specified in the product manual. Grounding the electrical system is crucial to prevent electrical shock; follow local electrical codes meticulously.

Crucially, utilize a Ground Fault Circuit Interrupter (GFCI) outlet for all pool electrical connections. A GFCI instantly cuts power in the event of a ground fault, significantly reducing the risk of electrocution. Never use extension cords with pool equipment. Inspect all cords and connections regularly for damage, and immediately discontinue use if any issues are detected. Prioritize safety above all else.
Grounding Requirements
Effective grounding is a non-negotiable safety measure when installing your Intex 12×24 pool. The metal frame must be properly grounded to dissipate any stray electrical current, minimizing the risk of electric shock. This typically involves connecting a grounding wire from the pool frame to a designated grounding rod driven into the earth, adhering to local electrical codes.
Consult a qualified electrician to ensure correct grounding procedures are followed. Improper grounding can render safety features ineffective. Verify the grounding connection regularly for corrosion or looseness. Never attempt to modify or bypass the grounding system. A properly grounded pool provides a vital layer of protection for all users.
GFCI Protection
Ground Fault Circuit Interrupter (GFCI) protection is absolutely critical for the electrical circuits powering your Intex 12×24 pool. A GFCI constantly monitors the electrical current and instantly cuts power if it detects a leakage, preventing severe shock hazards. All electrical outlets serving the pool area must be GFCI-protected.
It’s highly recommended to have a qualified electrician install and test the GFCI outlets. Regularly test the GFCI outlets yourself using the test and reset buttons – monthly testing is a good practice. Never use extension cords with pool equipment unless they are also GFCI-protected and rated for outdoor use. Prioritize safety; GFCI protection is a life-saving feature.
Pool Maintenance Basics
Maintaining your Intex 12×24 pool’s water quality is essential for a safe and enjoyable swimming experience. Regular water testing, at least twice weekly, is crucial to monitor pH, alkalinity, and sanitizer levels (chlorine or bromine). Adjust these levels according to the recommended ranges to prevent algae growth and ensure swimmer comfort.

Skim the surface daily to remove leaves and debris. Vacuum the pool floor weekly to eliminate settled dirt. Regularly clean or backwash the filter, following the manufacturer’s instructions, to maintain optimal filtration. Proper maintenance extends the life of your pool and keeps the water sparkling clean, providing a healthy environment for everyone.
Water Chemistry and Testing
Consistent water chemistry is paramount for a healthy and enjoyable Intex 12×24 pool experience. Invest in a reliable test kit – liquid test kits are generally more accurate than test strips. Key parameters to monitor include pH (ideally 7.2-7.8), total alkalinity (80-120 ppm), and sanitizer levels (chlorine 1-3 ppm, bromine 3-5 ppm).
Low pH can cause corrosion, while high pH reduces sanitizer effectiveness. Alkalinity acts as a pH buffer. Regularly adjust these levels using appropriate chemicals, always following product instructions carefully. Proper testing and balancing prevent algae blooms, cloudy water, and irritation to swimmers’ skin and eyes, ensuring a safe and inviting pool.
Regular Cleaning Procedures
Maintaining a clean Intex 12×24 pool involves consistent effort. Daily skimming removes leaves, insects, and debris from the surface. Vacuum the pool floor at least once a week to eliminate settled dirt and algae. Brush the pool walls and floor to prevent algae attachment – a crucial step!
Regularly clean the filter cartridge or sand filter, following the manufacturer’s instructions, to ensure optimal filtration. Empty the skimmer basket frequently. Consider using a pool cover when the pool isn’t in use to minimize debris accumulation and reduce chemical consumption. These procedures contribute to crystal-clear water and a more enjoyable swimming environment.
Winterizing the Intex 12×24 Pool
Proper winterization protects your Intex 12×24 pool from freezing damage. Begin by draining the pool completely, utilizing the drain plug or a submersible pump. Remove and thoroughly clean all pool components – filter, pump, ladder, and accessories – storing them indoors in a dry location.
Disconnect all plumbing and ensure lines are empty. Cover the pool with a winter cover, securing it tightly to prevent debris accumulation and water from entering. Consider using air pillows to absorb ice expansion. Regularly check the cover throughout winter, removing any accumulated water or snow to prevent structural stress. This careful preparation ensures a smooth spring reopening.

Draining the Pool
Draining your Intex 12×24 pool is a crucial step in winterization. You can utilize the pool’s built-in drain plug, though this method is slow. A more efficient approach involves a submersible pump, which quickly removes water. Direct the drained water away from your home’s foundation and neighboring properties, adhering to local regulations.
As the water level lowers, carefully push the liner towards the center to prevent wrinkles and potential damage. Once the water is sufficiently low, begin wiping down the pool walls and floor to remove any lingering dirt or algae. Ensure complete drainage before proceeding to the next winterization steps, safeguarding against freezing and structural issues.
Protecting the Frame and Liner
After draining, thoroughly clean and dry the Intex 12×24 pool frame. Disassemble the frame components, if possible, and store them in a dry, sheltered location to prevent rust and corrosion. The liner, once dry, should be carefully folded and stored away from direct sunlight and extreme temperatures to maintain its integrity.
Consider using a pool cover specifically designed for winterization. This protects the liner from debris and UV damage. For added security, especially in areas with heavy snowfall, a support structure for the cover can prevent collapse and potential liner tears. Proper storage and protection are vital for extending the life of your pool.